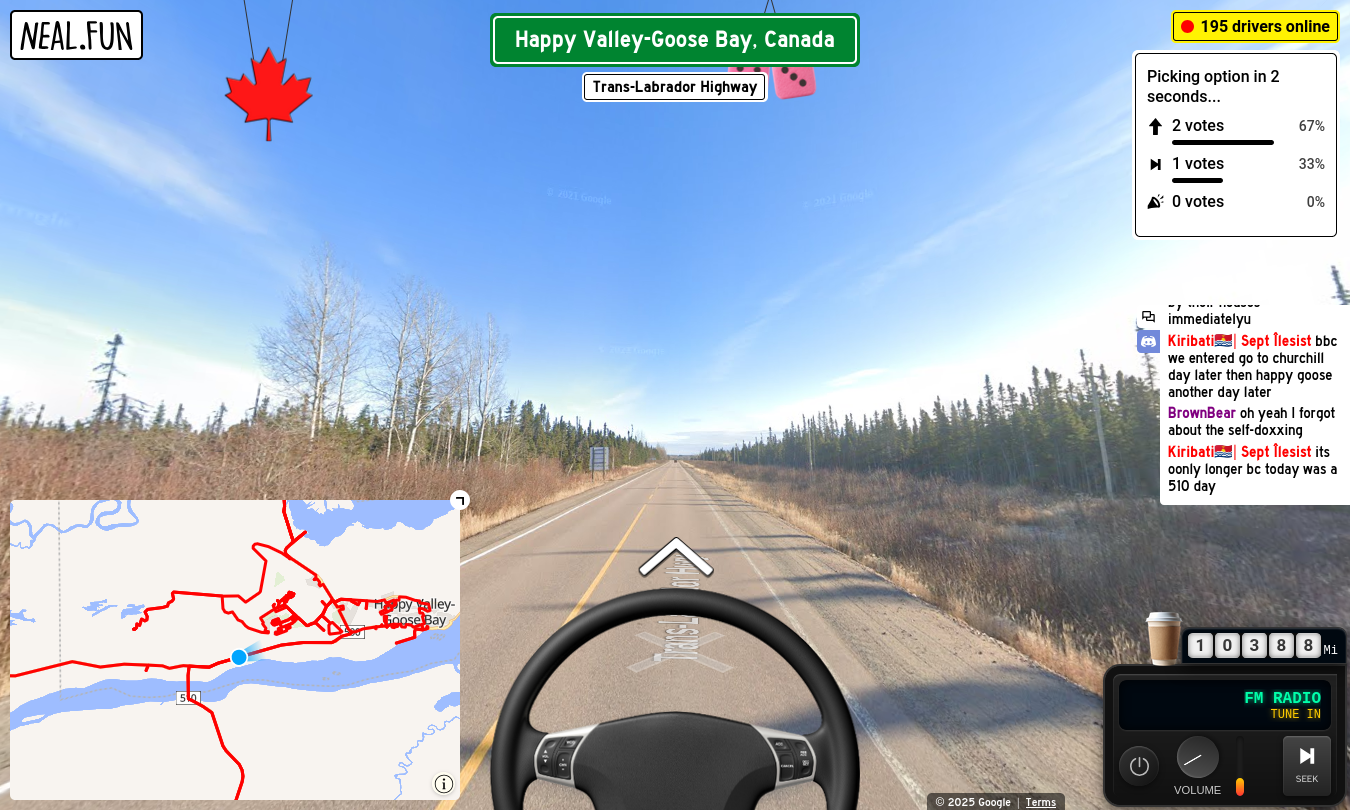
There’s an internet web game slash social experiment thing called Internet Roadtrip that started a few months ago, where players collectively “drive” a car on Google Street View and can vote for which directions to go in. Here’s the website if you’d like to look at it before reading the rest of this post: https://neal.
I was introduced to it on the day that the game launched by my friend Mikarific, who also happens to own the Discord server for the game. I thought it’d be fun to reverse-
My first idea for something cool that I could make was a bot with a built-
Reverse-engineering Google Maps
Unfortunately for me, Google Maps wasn’t as well-
The imagery metadata endpoint
My first step was to look up official documentation from Google. The first thing I found was this page: https://developers.
GET maps. - Takes in a location OR pano ID, and returns data formatted as follows:
{
   "copyright" : "© Alfredo Pina",
   "date" : "2019-10",
   "location" :
   {
      "lat" : 43.50789711388321,
      "lng" : -70.4357551261045
   },
   "pano_id" : "CAoSF0NJSE0wb2dLRUlDQWdJRDA5OXpYcWdF",
   "status" : "OK"
}
Note that each location that’s viewable on Street View is referred to as a panorama, often abbreviated to just “pano”. The possibility of using this endpoint to find the nearest pano to a location is interesting, and it could be what the game is using! However, it’d be difficult to scrape as I’d need to send a lot of requests.
Since the official documentation seemed lacking, my next step would have to be digging around their internal undocumented endpoints. Before I began actually poking at Google Maps, I searched for prior art. A promising article I found was by TheGreatRambler, which describes his efforts in reverse-
Area connectivity
Each panorama on Google Maps has a few “linked” panos, which are the ones that the clickable arrows in the Street View UI bring you to. From clicking around on Google Maps and watching network requests, I saw requests that looked like this: https://www.
I found out that the “ac” stands for “area connectivity” because the file name in the Content- header is areaconnectivity.. Anyways, here’s my description of the request:
GET www. - Returns a list of panoramas in a tile, including their internal links between each other. The Protobuf is encoded in an unusual URL-
- !6m3 - message with 3 items
- !1i39890 - tile x
- !2i47907 - tile y
- !3i17 - zoom level (not configurable)
- !8b1 - unknown boolean
This seemed exceedingly useful for collecting data en masse, as each tile request gave me a few hundred panoramas that I wouldn’t have to request individually. I also found a website named sv-
Here are the results of my attempt at using the endpoint for collecting panoramas to path through. Individual panos are rendered in blue, and the corners of tiles that I requested are in purple: 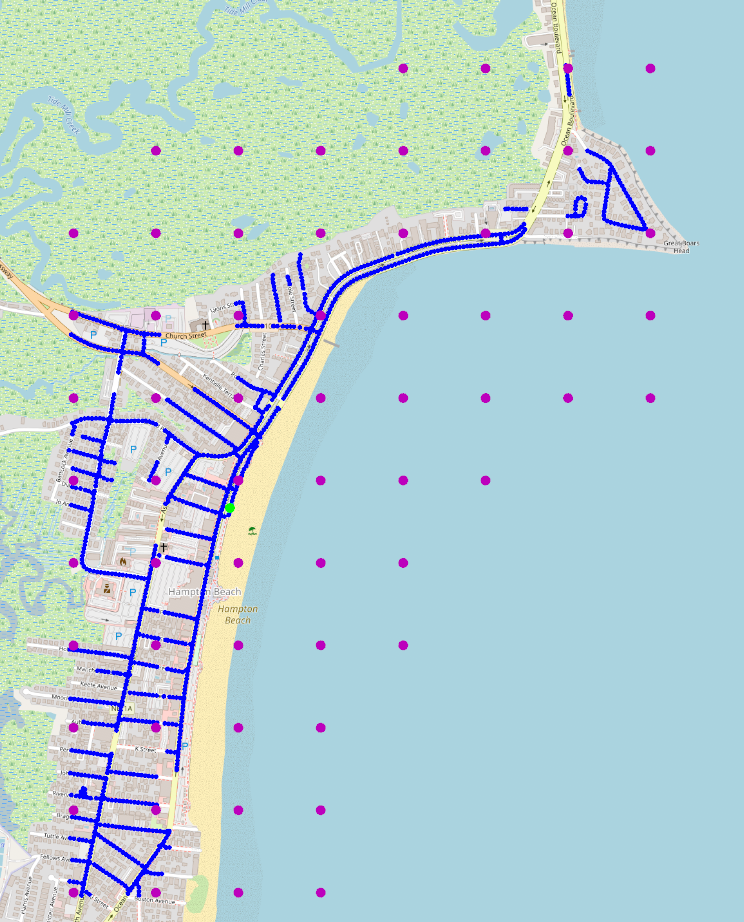 Notice anything off?
Apparently, the endpoint doesn’t include user-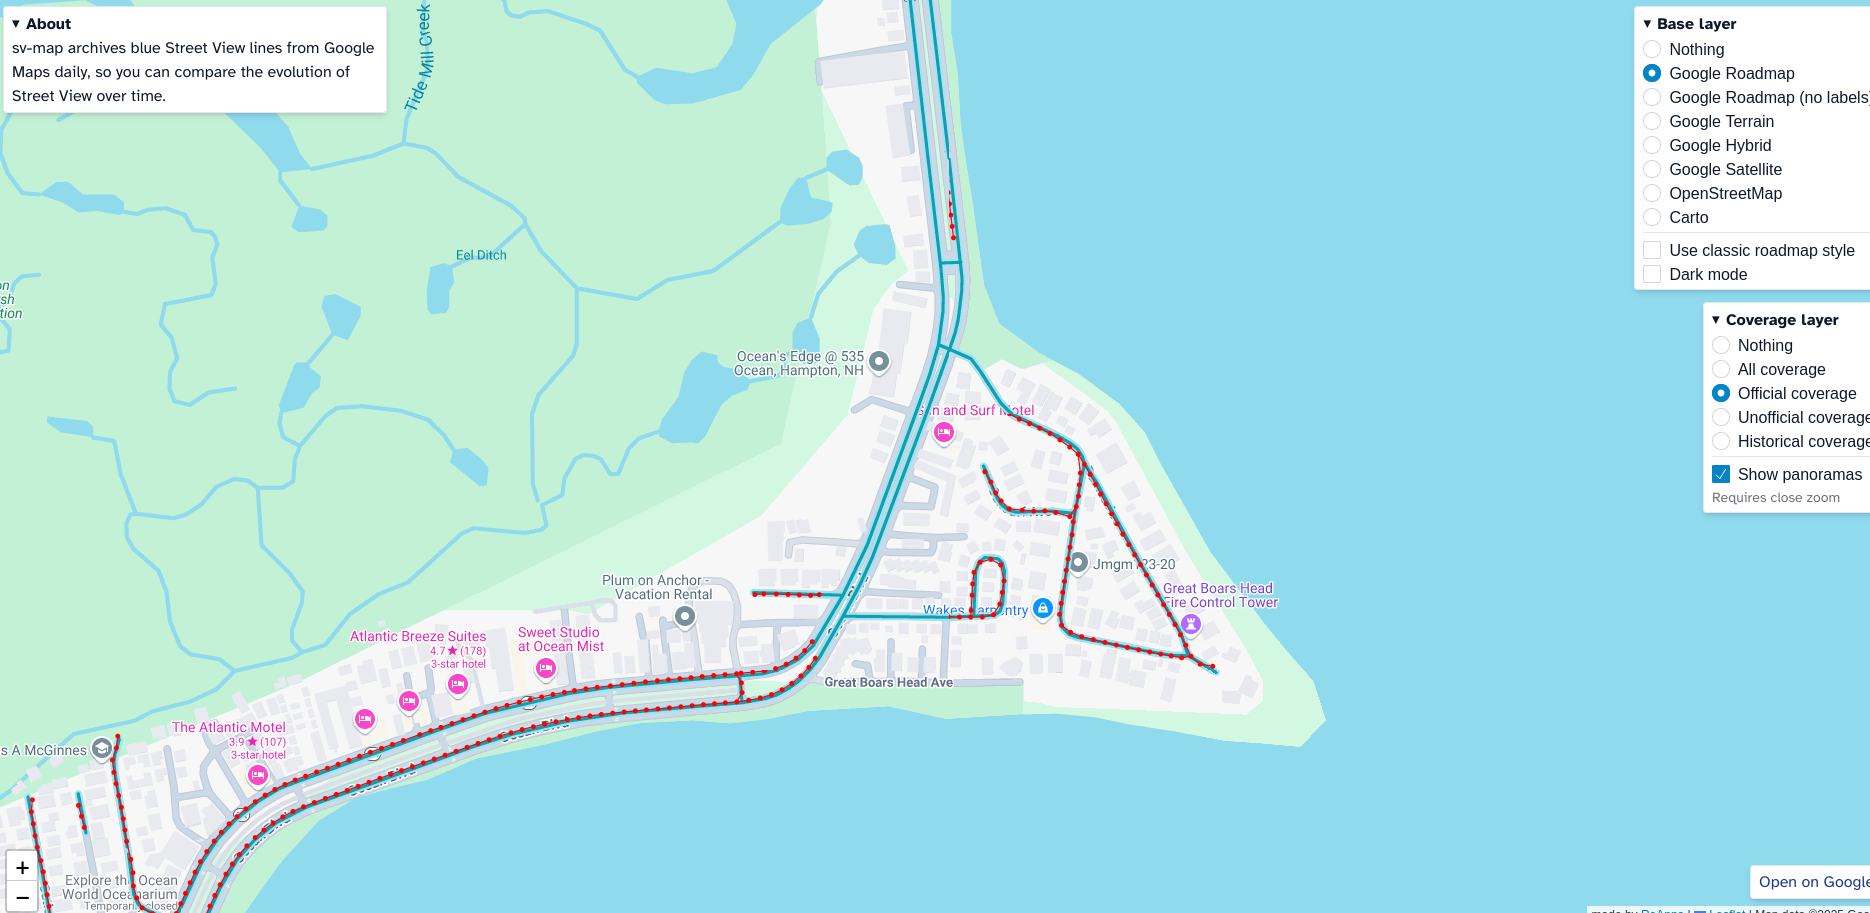
Something else I realized that diminished the value of this endpoint was that the connections returned here only include other panos in the same tile, so cross-
Types of panoramas
I think this is a good time to mention the two major types of panoramas on Street View.
The first type are the official coverage panos. Their IDs are always 22 random characters and look like this: VobQPxcTuq-. The IDs can always be URL-g, w, A, or Q.
The second type are a bit weird. They’re unofficial panoramas that anyone can submit to Google, and are usually referred to as unofficial coverage or UGC. Nearly all photospheres are of this type. The way they’re represented in the APIs is also weird. Usually, their IDs are a long string that starts with CAoS and sometimes has periods at the end, like CAoSFkNJSE0wb2dLRUlDQWdJRHF2YVNIWVE.. And in some API endpoints, those same panoramas are represented as shorter strings that start with CIHM (or CIAB, since ~April 2025), like CIHM0ogKEICAgIDqvaSHYQ. This really confused me for a while. After some searching on GitHub, I found two repositories that seem to have done their own independent reverse-
First was geobench, which contained an incredible snippet of code that could convert CAoS IDs into CIHM ones. Apparently, it’s just base64-. is used instead of =). Yeah, ok, of course it’s Protobuf. We also found a blog post by the creator of sv-
The second repo was streetlevel, which has a comment stating the following:
IDs for third-
party panoramas used to have 44 characters starting with AF1Q, but Google is currently transitioning to a different scheme which uses 22 to 28(?) characters staring withCI.
Note that you can’t just check for it starting with CI, since plenty of official coverage panoramas start with that. It may also be possible for official coverage panoramas to randomly start with CIHM/CIAB. If you need to distinguish between them, the Street View APIs will always either give you the type alongside the ID, or it’ll be Protobuf encoded.
listentityphotos
This is one of the endpoints mentioned in TheGreatRambler’s post, and it turned out to be an extremely useful endpoint. Google Maps uses it when you hover over a location to show a thumbnail preview (hence the name). Here’s what a request that I logged from Google Maps looks like: GET https://www..
There’s a client ID in there (wh4iaMf2Bpvb5NoPtajc6QY) which is described in TheGreatRambler’s post, but it turns out that it’s not actually necessary. With help from Mika, here’s a cleaned up version of that Protobuf string with explanations and without all the unnecessary fields:
- !1e3 - unknown enum
- !5m15
- !3m1
- !2i100 - pano limit (max 3000)
- !7m12
- !1m3
- !1e2 - panorama type (Google calls this field “frontend”): official coverage
- !2b1 - tiled
- !3e2 - image format: panoramic
- !1m3
- !1e3 - panorama type: the old type for unofficial coverage
- !2b1 - tiled
- !3e2 - panoramic
- !1m3
- !1e10 - panorama type: the new type for unofficial coverage
- !2b1 - tiled
- !3e2 - panoramic
- !1m3
- !3m1
- !9m2
- !2d-70.61388529067821 - longitude
- !3d43.16758144461539 - latitude
- !10d300 - radius (in meters)
The important part: You can specify a location, a radius, and the number of nearby panos to fetch. The limit seems to be 3000, though it’s a bit weird in that if you put exactly 3000 you’ll sometimes get a few dozen less results than if you put a larger number. However, when it reaches the limit it’s not like they’ll be sorted by distance, so in those cases you’ll have to decrease your radius to get accurate data anyways.
This endpoint also initially appears ratelimited, but if you just request https://maps.NID cookie then you’ll be golden. Randomizing your IPv6 for every request also works, but it’s unnecessary, so, um, maybe don’t waste your time doing that like I did at first.
This endpoint ended up being critical to my pathfinder, as I could use it to reliably get a list of panorama IDs in an area (as long as there’s less than 3000 panos in that area). In the pathfinder’s code, I made it send 3000 as the limit, but because of that issue that I mentioned two paragraphs ago it checks if there’s more than 2900 results and shrinks the radius for those cases.
Why do panoramas have two coordinates?
This is when I started to go a little insane. Apparently, each panorama on Google Maps actually has two latitude/
I first noticed this variance when I saw that some of the coordinates from the game didn’t match what I was getting from listentityphotos. I needed to distinguish between the types of coordinates in my notes, so I started calling them “game” and “real” coordinates respectively. In retrospect, this was a pretty bad choice of nomenclature, as I found out that “game” coordinates are the GPS coordinates that the photo was taken from and “real” coordinates are snapped to the road. For the purposes of this blog post, I’ll be calling them “actual” and “search” coordinates instead (thanks Mika).
Also, at some point I learned that one Google Maps endpoint refers to “actual” coordinates as originalLat/
To be clear:
- actual coordinates - The original GPS coordinates - aka originalLat/originalLng, aka exit locations, aka “game” coords.
- search coordinates - Usually snapped to the road - aka lat/lng, aka entrance locations, aka “real” coords.
Here’s my summary of how the different types of coordinates are used by Google Maps:
- Imagery metadata: Returns search coordinates.
- Area connectivity: Returns actual coordinates, and the tiles also seem to be based on actual coordinates.
- listentityphotos: Returns search coordinates, and the radius check is also based on search coordinates.
- Tile metadata: Returns both (this is where the names originalLat/originalLng are used).
- SingleImageSearch: Searches using search coordinates, and returns actual coordinates.
- GetMetadata: Returns actual coordinates.
For unofficial coverage, both types of coordinates are usually (but not always) the same.
The Street View tile endpoints
Here’s their documentation: https://developers.
These endpoints are located at tile.. The first one that’s relevant for us lets you fetch the metadata (including both types of coordinates) for a panorama, and the second relevant one lets you send a list of up to 100 coordinates and a radius to search, and it returns the ID of the nearest pano for each location that you passed.
The first one is used by sending a GET request to tile., and the second one is a POST to tile..
Unofficial coverage panoramas are required to be encoded in their Protobuf (CAoS) format when sent to these endpoints.
I learned about these endpoints pretty late, because almost no one seems to use them and the documentation wasn’t linked from the other Street View API documentation that I’d found. When I found it at first, I suspected that this might actually be answer to which endpoints Internet Roadtrip is using internally, because it doesn’t require reverse engineering, it tells you links, and it includes the names of locations. Still, there were a few things that didn’t match up (such as the names not always being the same as the ones in-
It also requires an API key and has pretty limited usage (10,000 free requests per day) so I would never be able to use it for the pathfinder either, but the fact that it tells you both types of coordinates did make it pretty useful for debugging.
SingleImageSearch
This one allows you to pass in a location and get a pano ID back. In this way it’s similar to listentityphotos, but SingleImageSearch only allows you to get a single panorama at a time. It’s available from three endpoints:
GET maps.googleapis. com/ maps/ api/ js/ GeoPhotoService. SingleImageSearch? pb= PROTOBUF&callback= callbackfunc GET www.google. com/ maps/ photometa/ si/ v1? pb= PROTOBUF POST maps.googleapis. com/$rpc/ google. internal. maps. mapsjs. v1. MapsJsInternalService/ SingleImageSearch -H 'content- type: application/ json+protobuf'.
I mostly focused on the POST one, but all of the endpoints are similar. Here’s some example usage:
curl 'https://maps.googleapis. com/$rpc/ google. internal. maps. mapsjs. v1. MapsJsInternalService/ SingleImageSearch' -X POST -d '[["apiv3",null,null,null,"US",null,null,null,null,null,[[false]]],[[null,null,43. 507983205784335, -70. 43572943092886],100],[null,null,null,null,null,null,null,null,[2],null,[[[2,true,2],[3,true,2],[10,true,2]]]],[[1,2,3,4,8,6]]]' -H 'Content- Type: application/ json+protobuf'
And here’s that request JSON annotated with descriptions:
[
	[ // context: RequestContext
		"apiv3", // product_id
		null, null, null,
		"US", // policy_country_code
		null, null, null, null, null,
		[[false]] // that false is for "don't allow restricted hotel photos". i don't know what that means.
		// there's a few extra fields that are allowed to be set here
	],
	[ // location: PhotoByLatLngQuery
		[ // center
			null, null, // unused
			43.507983205784335, -70.43572943092886 // lat, lng
			// extra: planet
		],
		100 // radius (in meters)
		// extra fields
	],
	[ // query_options: PhotoQueryOptions
		null, null, null, null, null, null, null, null,
		[2], // ranking_options
		null,
		[
			[ // supported_render_strategy
				[2, true, 2], // frontend, tiled, image_format
				[3, true, 2],
				[10, true, 2]
			]
			// extra fields
		]
	],
	[ // response_specification: MetadataResponseSpecification
		[1, 2, 3, 4, 8, 6]
		// extra fields
	]
	// extra fields
]
We got these descriptions by running skull’s fantastic req2proto tool with the following command:
./req2proto -X POST -u 'https://maps.googleapis. com/$rpc/ google. internal. maps. mapsjs. v1. MapsJsInternalService. SingleImageSearch' -p google. internal. maps. mapsjs. v1. MapsJsInternalService. SingleImageSearch -H 'Content- Type: application/ json+protobuf' -v -o output- singleimagesearch
As you may be able to tell, there’s lots more that could be explored here that we didn’t look into. You may also notice that I haven’t been describing the Protobuf responses, and that’s because it’s difficult to explain when none of the fields have proper names. I’ve chosen to leave this as an exercise to the reader.
GetMetadata
My beloved. This endpoint takes in up to 200 pano IDs and gives you some information about the panoramas, including their links and their “actual” coordinates. This, combined with listentityphotos, is what I ended up using for scraping Street View. Originally I’d disregarded the endpoint because I didn’t know that we could pass in multiple pano IDs, but after Mikarific told me about this discovery, suddenly the endpoint became a lot more useful.
Here’s are the endpoints:
GET https://maps.googleapis. com/ maps/ api/ js/ GeoPhotoService. GetMetadata? pb= PROTOBUF GET https://www.google. com/ maps/ photometa/ v1? pb= PROTOBUF POST maps.googleapis. com/$rpc/ google. internal. maps. mapsjs. v1. MapsJsInternalService/ GetMetadata -H 'content- type: application/ json+protobuf'
Again, I’ll only focus on the POST one. Here’s what the query that I use looks like:
[
	[ // RequestContext, already described above
		"apiv3",null,null,null,"US",null,null,null,null,null,[[0]]
	],
	["en", "US"], // localization_context
	[ // query
		[
			frontend, // 10 if it's unofficial coverage, 2 otherwise
			pano_id // unofficial coverage pano ids must be protobuf decoded
		],
		... // up to 200 queries, the request fails if you send more
	],
	[6] // response_specification
]
If you want more info, here’s the req2proto command:
./req2proto -X POST -u 'https://maps.googleapis. com/$rpc/ google. internal. maps. mapsjs. v1. MapsJsInternalService/ GetMetadata' -p google. internal. maps. mapsjs. v1. MapsJsInternalService -H 'Content- Type: application/ json+protobuf' -v -o output- getmetadata
Quirky Panoramas
We found some pretty weird things from exploring Street View. Here are some of these things:
- The actual/search coords for some panos can vary by a lot, sometimes thousands of kilometers. The Internet Roadtrip community calls large-distance teleports caused by these variations “portals”.
- Some links connect very distant panos, and they can be created deliberately when submitting a new pano to Google Maps. The Internet Roadtrip community calls large-distance teleports caused by links “wormholes”.
- Some panos have no “actual” coords present.
- Some panoramas have all of their coordinates set to 0, but only when you request them from the official tile metadata endpoint. (like
CAoSFkNJSE0wb2dLRUlDQWdJQ000cEhpYXc.) - Some panos have hundreds of links. (like
CAoSF0NJSE0wb2dLRUlDQWdJRGE4X3lMd2dF)

Reverse engineering Internet Roadtrip’s options
While I was figuring out the different Street View endpoints, I was also logging data that I got from Internet Roadtrip’s WebSocket and analyzing it to figure out how it related to the data from Street View. After I gathered sufficient data, I started analyzing it to figure out patterns.
My hypothesis was that the game got a number of nearby panoramas, and then filtered them by their heading (presumably ±90° from the current heading) and then enforced some minimum and maximum distance.
To check, I wrote a small Python script that iterated through the data that I’d collected and I got these results: 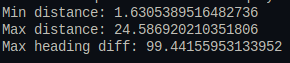
Very interesting! It seemed like the maximum distance is maybe around 25 meters, and the maximum heading difference is ±100°. Mika also asked the creator of the game for some hints, and this is what he told her:

Uh huh. I questioned whether there was a bug in my code, and for a minute I thought I’d messed up due to mixing up latitude and longitude in one place, but that wasn’t the case. I’d have to ignore Neal’s “hint” and stick with ±100°, then.
At this time, the players were headed towards the border to Canada, and we wanted to make sure that it was possible to cross. None of the crossings had perfect Street View coverage, but there was one that the players believed would work because Street View showed arrows for it, and Neal said it was possible. However, the two panoramas that would connect it were 116 meters apart:  I wasn’t sure if I could fully trust Neal’s info at this point due to the last thing that he told us, but he sent a video of him running the site locally to prove that it really was possible, so maybe the maximum distance is just higher than I thought. Huh.
The two endpoints theory
Here’s a sample of what a typical message from the game about a stop with multiple options looks like (minus a few irrelevant fields):
{
	"stop": 103539,
	"pano": "JtesQylWomqxytsc4GJzaw",
	"heading": 182.2152,
	"options": [
		{
			"description": "Doak Rd",
			"heading": 182.21973,
			"pano": "cPqKVweKUPcYVHeMPN_8AA"
		},
		{
			"pano": "JL2N0LvO36nvSub5Mt_i4A",
			"description": "298 Waldo Ave",
			"heading": 147.67201962009784,
			"lat": 44.43990582934507,
			"lng": -69.03259129367046
		},
		{
			"pano": "6NcCro6tQ6OpWb0FV72FoQ",
			"description": "34 ME-7",
			"heading": 223.8477561925429,
			"lat": 44.439883957190474,
			"lng": -69.03278497630757
		},
		{
			"pano": "4o5o4nSyMjhhVF6Z8XMOEw",
			"description": "34 ME-7",
			"heading": 243.1870402691808,
			"lat": 44.439899697494084,
			"lng": -69.03287748101417
		}
	],
	"lat": 44.43997942971385,
	"lng": -69.0326565311778
}
You might notice that the first option is missing the lat and lng fields. This turned out to be a very important observation.
Apparently, almost all WebSocket messages from Internet Roadtrip have at least one option like this, and they’re always at the beginning of the options array. I also realized that the heading field for those options was rounded more, and the fields were in a different order. Could this mean that the game is actually getting the options from two sources, and then combining them?
There was something else that I noticed at this time: 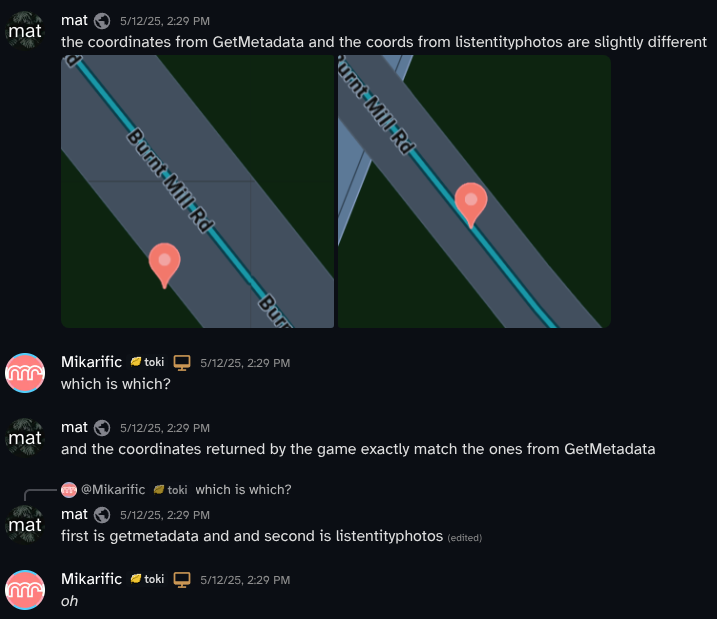 This is when I started forming the concept of “actual” and “search” coordinates. Every coordinate that I saw from the WebSocket was the same as when I manually queried the pano IDs in the GetMetadata endpoint. This complicates things, because I was fetching nearby panoramas from
 listentityphotos (which if you recall, uses “search” coordinates).
I also went back to that crossing in Canada, and I noticed that the panoramas were considered to be linked in the GetMetadata response. From analyzing some more data, it became apparent that the options without lat and lng seemed to be derived from the official Street View links and the rest were decided in some other way.
Further analysis
Since the first type of links was mostly solved, I shifted my focused to the options with lat and lng.
Using matplotlib, I generated a bar chart that showed the relative headings in the data that I had (filtered for that second type of option): 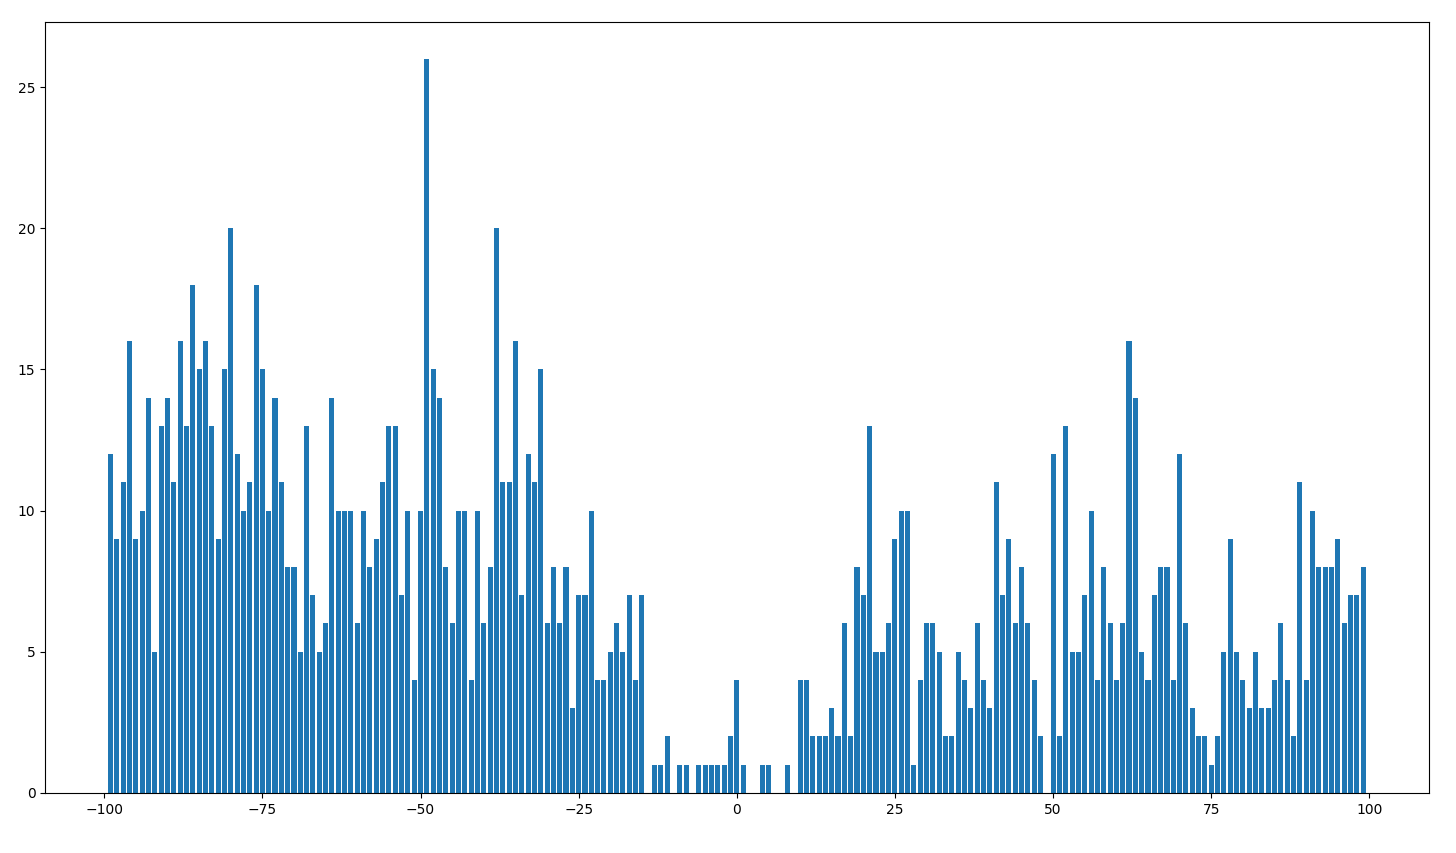 Still ±100°, but interestingly there seem to be a lot less options of this type near 0° difference.
Next, I graphed the lat+lng differences to visualize the distance limit: 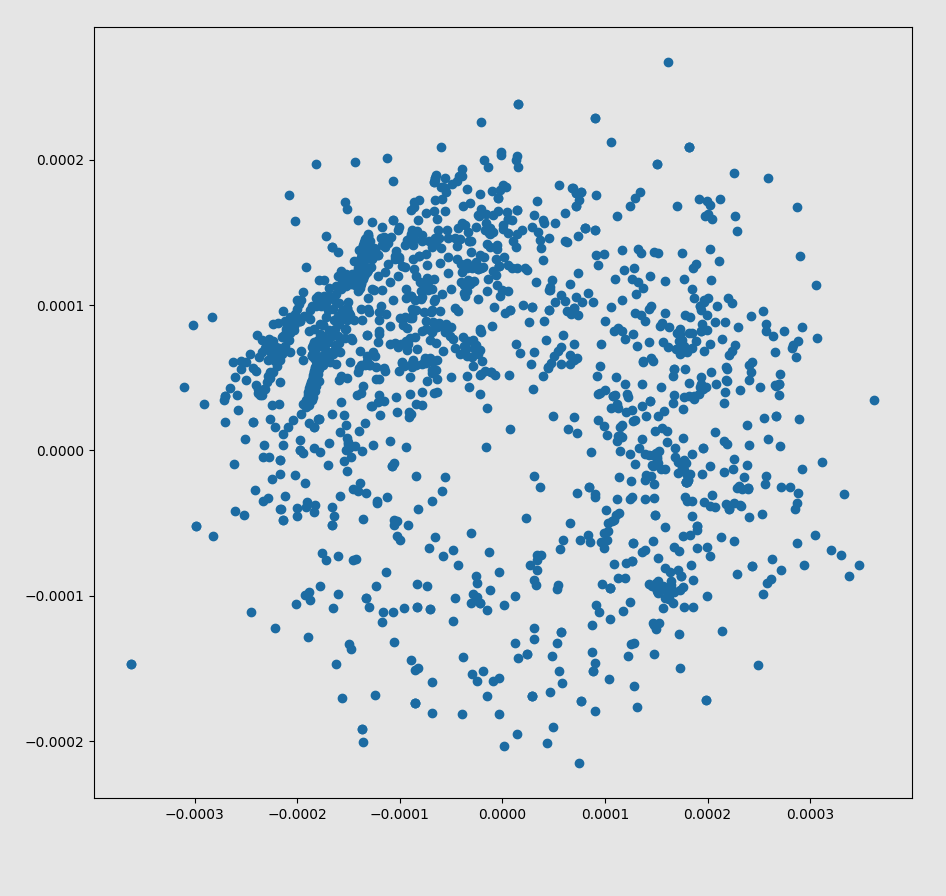 Not very conclusive, it just shows that the car was mostly heading in the same direction while I was gathering data.
Here’s a third graph I made, this time analyzing the correlation between heading and distance: 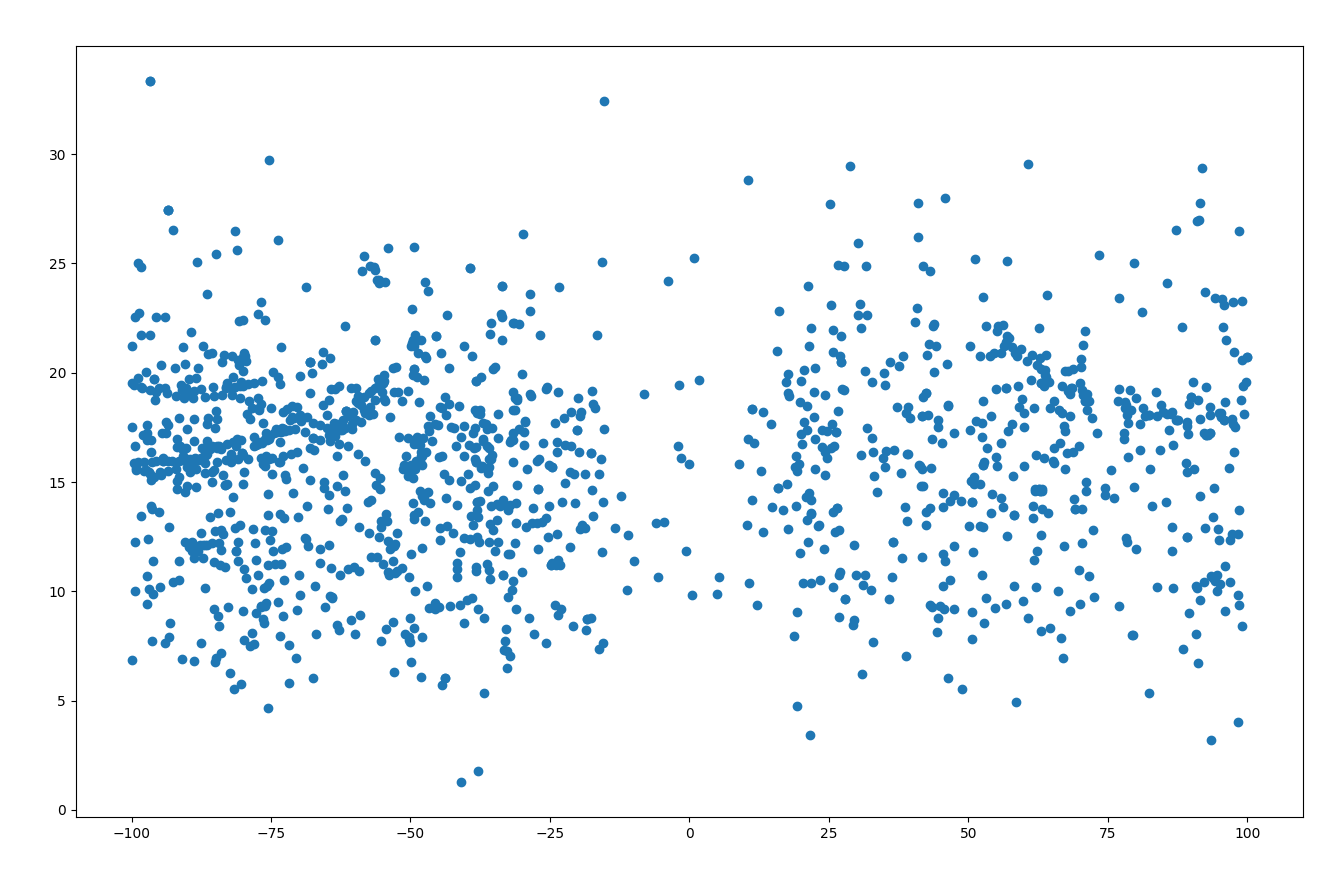 The average distance seems to be around 15 meters. Also, there’s still that interesting gap near 0°, and if you look closely, some headings (like around -45°) appear to have a slightly higher concentration of options. Weird.
After even more data collection and analysis, I realized that these options were always sorted in a certain way, and there can be up to 5 of them. This gave me an idea. I had a script at this point to validate how accurate my re-
- For the current panorama, fetch the links from
GetMetadataand add them to the options. - Request the current location in
listentityphotoswith the max distance being 20 meters. Then rotate the current heading from[-90, -45, 0, 45, 90], move 15 meters forward (using the inverse Haversine formula), and find the nearest panorama in thatlistentityphotosresponse. - Filter all options so their heading is within 100° of the current heading.
This was the most accurate I’d gotten it to be so far, but it wasn’t perfect.
I played around with the numbers some more, and…  Updating the distance from 15 meters to 13 made it almost perfect! The game still seemed to be applying more filtering to the options though (as in, my script had false positives), so the cooking couldn’t stop yet. Also, after I collected more data I realized that there wasn’t actually a hard-
Remember how earlier I was seeing a gap around 0° heading difference for the non-GetMetadata options? Most options derived from GetMetadata have a heading difference of 0°. It seemed like a reasonable guess that the game might be filtering out panoramas with similar headings, so I implemented this into my own code, and the accuracy went up again! However, it was now filtering incorrectly sometimes. A bit more banging my head on my keyboard later, and I had it:
- For the current panorama, fetch the links from
GetMetadataand add them to the options. Use the heading thatGetMetadatagives you instead of calculating it yourself, and filter for options within 100° of the current heading. - Request the current location in
listentityphotoswith a high maximum distance. Then rotate the current heading by[0, -45, 45, 90, -90]and move 13 meters forward. For each location:- Get the nearest panorama from
listentityphotos. - Calculate its heading with the Haversine formula.
- If it’s within 100° from the current heading, AND not within 15° of any other option, add it to the options.
- Get the nearest panorama from
My implementation had a few flaws, but I thought this description was good enough to share publicly. I took a break from Discord for a bit at this point, and when I came back, some things had changed.
Oh, Neal gave us the source code
And it’s really funny. Before, I believed that he was either using the official APIs that required keys, or some obscure Street View library that I hadn’t been able to find. I’d looked through multiple Street View libraries on GitHub though, and I hadn’t been able to find any that implemented everything that’d be necessary for the game to work.
He was using the official Google Maps JavaScript API on his server with Puppeteer.
What? So, apparently, you can use Google Maps as a client-https://maps. as a script to your website. Then, you can call functions like new google. to get links and new google. to get the nearest panorama to a location. And it’s sorta documented and everything too!
This wasn’t what we expected, but it did explain a lot. Those two functions internally called the GetMetadata and SingleImageSearch endpoints respectively, and the JavaScript library is what was causing some of the weirdness I noticed (like some headings being more rounded).
I was also relieved when I found out that my reverse-
Implementing the pathfinder
I’d already written some code for the pathfinder at this point, but now I finally really had everything I needed.
For performance and usability, I knew that the pathfinder had to be written in Rust, and that it’d run on my own VPS. I used the A* search algorithm (which is usually optimal, depending on the heuristic), and based my implementation of it on the high-
To make it as accurate as possible, I made sure that absolutely everything from Neal’s code was implemented, including the unintended features like portals and wormholes. I couldn’t do it in exactly the same way (because that’d be way too slow), but if I could get it to be ~99% accurate then I’d be very happy. The game gives the players more time to pick options when there’s more than one option, so after I ported the option picking code I tweaked the costs for the pathfinder to match the time (in seconds) that the game takes for each countdown. To make the costs as accurate as possible, my friend Yui gave me some up- If you’re wondering, 1 option has a latency of 0.
I thought it’d be cool to make my pathfinder show the path while it’s being calculated, so the way I did this was by providing a WebSocket interface that takes in path requests and periodically responds with the known path closest to the destination, and the path that’s currently being looked at by A*. This ended up being a bit slow for long paths (because it’s transmitting every node in both paths every 100ms), so my solution was to make the client remember both paths, and have my WebSocket send the number of nodes to preserve and an array of nodes to append.
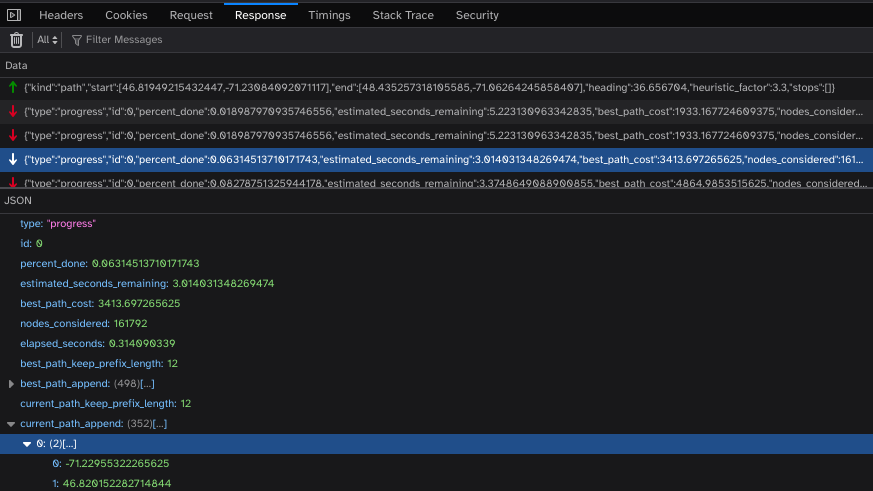
You might notice that the array is of [longitude, latitude] values instead of [latitude, longitude], and that’s because the map rendering library that Internet Roadtrip uses (maplibre-[x, y].
Optimizations
Optimizing Rust code happens to be one of my favorite pastimes, so I poured a lot of effort into making it fast. It also wouldn’t be particularly enjoyable to use if the pathfinder took forever to find common paths, so that was some extra motivation for me. My process for optimizing code is the following:
- Make sure I have some way to measure speedups. Sometimes this is a simple timer, sometimes I use a proper benchmarking library like criterion.
rs. Optimization attempts often end up making the code slower, so this step isn’t optional. - Implement the easy general optimizations that can be applied to most programs. Many of these are covered in nethercote’s Rust Performance Book, and include things like using mimalloc instead of the default allocator, using rustc-
hash instead of the default hasher, and using CompactStr instead of String whenever the strings are expected to be small. After each optimization attempt, I benchmark the code again and only keep the optimization if it was faster than before. - Run a profiler to find hot paths. My favorite one is cargo-
flamegraph (which uses perf), though when I’m looking for certain types of problems I’ll run other profilers like Callgrind or Heaptrack instead. - Read the code for the slow functions (and the code that’s related to it), change whatever I feel might be faster, and benchmark. This is the last step because it’s never done; the code could always be faster :3.
A large part of the pathfinder’s slowness comes from fetching data from Google’s APIs, which meant that I should be caching as much as possible to avoid repeating requests unnecessarily. I took this into account when writing my initial implementation, so I made my listentityphotos requests cacheable by snapping the requests coordinates to the center of “tiles” and setting the radius to a fixed amount that would cover every pano in the whole tile. My tiles are squares because they’re easy to do math with. I briefly considered making them hexagons instead to slightly reduce the number of requests that I’d have to make (because the radius of the panos in the listentityphotos response is a circle, so I usually have to discard a few panos from the response), but I tragically came to the realization that this would be way too complex and would only (maybe) speed up uncached lookups while slowing everything else down. Later, I reduced the amount of requests that I had to make by requesting larger tiles first and then halving their size and re-
Originally, I was caching the listentityphotos and GetMetadata responses by writing to files on the filesystem, but this was inefficient and didn’t scale terribly well. Databases like Postgres and SQLite were on the table, but performance was critical and this felt like a good opportunity to use a key-
From running a Flamegraph, I found that my functions related to getting options were slow, and particularly the code related to calculating the distance between two points was unexpectedly slow.
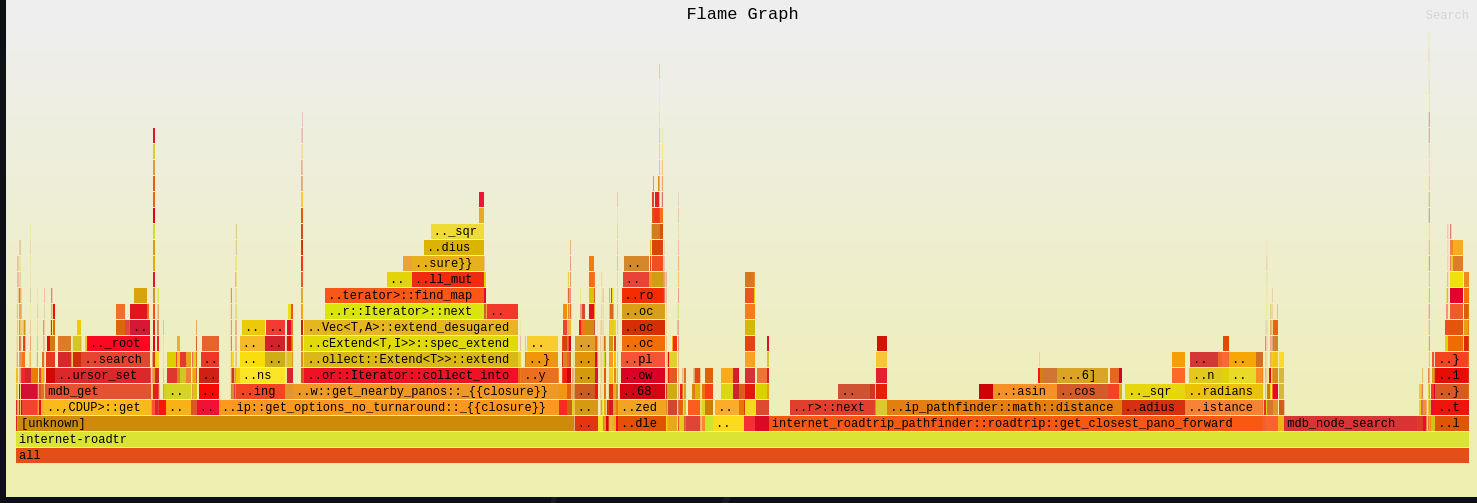
get_options_no_turnaround and get_closest_pano_forward are the relevant ones here)Here’s mostly what my distance code looked like originally:
pub fn distance(a: Location, b: Location) -> f64 {
    // copied from geo::Haversine.distance(a, b)
    let theta1 = a.lat.to_radians();
    let theta2 = b.lat.to_radians();
    let delta_theta = b.lat.to_radians() - a.lat.to_radians();
    let delta_lambda = b.lng.to_radians() - a.lng.to_radians();
    let a = (delta_theta / 2.).sin().powi(2)
        + theta1.cos() * theta2.cos() * (delta_lambda / 2.).sin().powi(2);
    let c = 2. * a.sqrt().asin();
    EARTH_RADIUS * c
}
I was able to get some more speed by converting a few numbers to f32s and calculating the deltas differently, but after a certain point it became apparent that I’d have to figure out ways to reduce the number of calls to distance instead. Most of the calls happened when my code was trying to find the nearest panorama to a given location, so I thought if I was able to come up with an approximate distance function, then I’d be able to use that to make it quickly filter out options that are obviously not the nearest one.
I realized I could simply use the Pythagorean theorem to get an approximation, as long as I multiplied the latitude and longitude by values that are correct enough. Latitude lines are always evenly spaced apart (EARTH_ per degree), and the spacing of longitude lines depends on the latitude (EARTH_). Then, I could multiply the result by 0.
Low-level optimizations
Many of my optimizations involve boring things like performing operations in a different order, forcing the compiler to inline random hot functions, and removing code that isn’t necessary. Some other ones involved tweaking some numbers until I found their optimal value like for the A* heuristic, certain radius values, cache sizes… I won’t be talking about these optimizations in detail since they’re often found through guesswork and in my opinion aren’t super interesting to talk about.
My favorite optimizations are the ones that involve changing how data is represented in memory. So, remember how pano IDs are usually around 22 bytes long? I was representing them with a CompactStr, so they were usually actually 24 bytes in memory. I wanted to reduce that, and I realized that since I never actually used the string representation of the IDs when I’m not interacting with the Street View APIs, I could just map them to a smaller identifier (like a 32-u32 types, and this led to a ~20% speedup and ~50% memory usage reduction.
I later also found a relatively similar optimization for my Location type. Before, it looked something like this: struct Location { lat: f64, lng: f64 }, which is pretty much what you’d expect for a representation of geographic coordinates. At some point I tried making them f32 types instead, but the accuracy loss was too significant. One fact about geographic coordinates (in WGS 84, which is the most common representation) is that the values will always be between (-90, 90) for latitude and (-180, 180) for longitude. I realized I could exploit this fact to have a more compact representation if I could map the values onto a 32-
My final major optimization — which sadly isn’t as exciting as the others — was introducing a cache to the function that predicts the options that the game will show. I found that each result had approximately 1.
Userscript
I’d been developing the pathfinder with a test page outside of Internet Roadtrip, but if I wanted people to actually use it then it’d have to have good integration with the game. Userscripts (like with Violentmonkey, Tampermonkey, etc) are how everyone does this. I already had plenty of previous experience writing userscripts for other purposes, and I’d actually already written a few of them for Internet Roadtrip. Most of them were to help with developing the pathfinder, but here’s one that I posted to the Discord server using an alt account before I’d made my involvement in Internet Roadtrip known:

Anyways, since I used maplibre-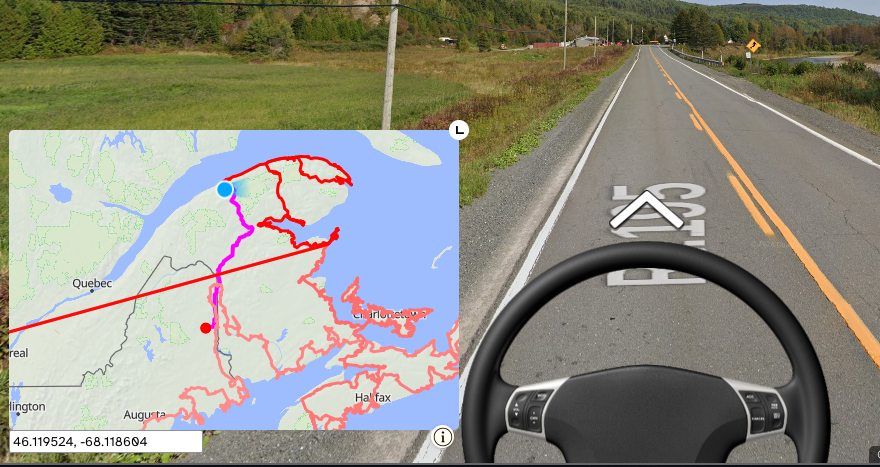
I also made a few tweaks to make it work better in-
I’d been posting some of my progress in the small group chat for Internet Roadtrip modders, and it’s at this point that Netux, another userscript developer, volunteered to help. He fixed several issues in my code and updated it to use the Internet Roadtrip modding framework that Mika had made, and he also made it integrate with the Minimap Tricks userscript by Jakub which resulted in significantly increased usability. Thanks Netux <3.
Botting the game
So, remember how I said that I wanted to make the pathfinder to help with botting? I’m going to actually talk about that now. I originally just wanted to be able to add an arbitrary number of votes to any option, which meant that I’d have to be able to bypass the game’s ratelimits. I actually already had experience reverse-
I wrote my initial ratelimit evasion code in about 15 minutes, and thus it wasn’t particularly sophisticated. The first problem I had to work around was that the website has the Cloudflare setting enabled that makes it do HTTP/
To test my ratelimit bypass, I added a hundred votes to make the car honk. Surprisingly, no one noticed (or at least, no one mentioned it in the Discord), despite rounds usually getting a couple dozen votes.
Bot wars
There were always a few other people trying to bot the game, but for quite a while no one but Mika and I knew how to do it correctly. Eventually, though, an unknown individual with the requisite knowledge showed up and decided to use their power for evil:  Soon after we noticed the other bots, Mika started using my ratelimit bypass to counter-
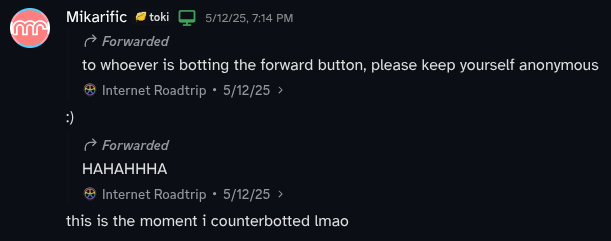 This other bot had an interesting quality though, which is that the number of votes that they placed varied significantly per-
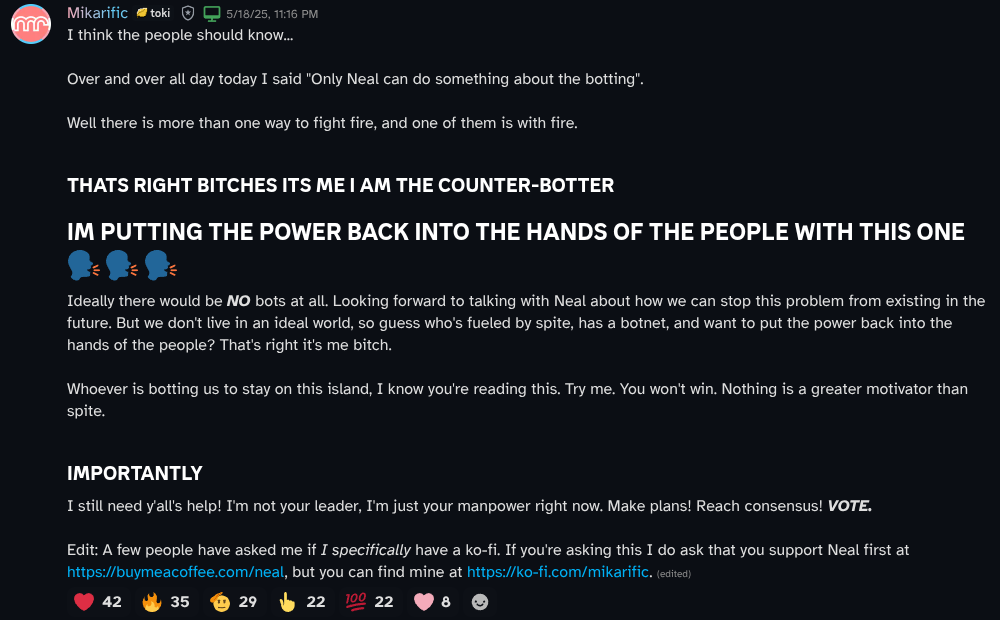
The evil bots stopped for a few days, until… 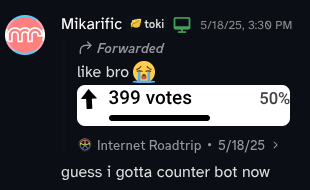 Someone had figured out how to bot again, and they were using their powers to try to annoy the players as much as possible. They did this throughout pretty much an entire day and it was a big deal at the time (still frequently being mentioned to this day). I wasn’t paying much attention to the game during this time, but Mika was. After a lot of counter-
After this, Neal had to amp up the level of bot protection. This time, the request you send to make a vote has a token attached to it, which is obtained by sending a Cloudflare token to a new API endpoint in the game. Conveniently for us, the Cloudflare token wasn’t checked to be generated from the same IP that the vote request was sent from, so I made a little program that repeatedly generates Cloudflare tokens on my local computer and sends them over to my server that we’d been using to send votes.
Way later, while I was testing my pathfinder before it was released, I rigged a few votes to get the players unstuck from certain loops and to get them going through less obvious but more optimal routes. I also wasn’t being too stealthy, so some players noticed:

I also discovered at one point that the game appeared to accept votes for invalid options, so I botted an invalid option to win a vote a few times just to see what would happen. The votes were apparently silently rejected though, so this didn’t lead to anything. Other than these things, the new ratelimit bypass didn’t really get used, since there didn’t end up being a need for more counter-
The Internet Roadtrip XSS
It’s not actually as bad as it sounds. I was looking at the network requests in Firefox DevTools while debugging an unrelated issue, when I saw a request for a Discord emoji. This reminded me that the game had support for custom emojis in their Discord chat viewer, and I began to wonder how they’re being parsed and if it’s somehow exploitable. I searched for cdn. in the DevTools debugger tab, and found the following code: 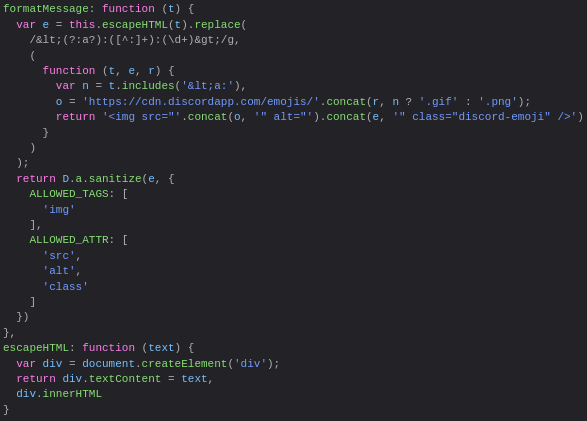 Oh my. Here’s my description of that code:
- It escapes the HTML tags in the message (this part is good).
- It performs a Regex replacement for anything that looks like a custom Discord emoji, which when not being rendered, look like this:
<:id:name>. The Regex correctly limits the ID part to be a number, but incorrectly allows the name to be absolutely anything, as long as it doesn’t contain a colon character. - For strings that match the Regex, it interpolates them as such:
<img src="https://cdn..discordapp. com/ emojis/{id}.{png or gif}" alt="{name}" class="discord- emoji /"> - Finally, it goes through DOMPurify to only allow
imgtags with the attributes above. This was a good call on Neal’s part, since it significantly limits the scope of the bug.
Because the Regex allowed anything for the name (which is put in the alt), that meant that it could contain a quote character, and then I could start writing my own attributes.
For example, I could send a message like this:
<:" class="meow:1>
and it'd get replaced to this:
<img src="https://cdn.discordapp.com/emojis/1.png" alt="" class="meow" class="discord-emoji" />
which gets purified into this:
<img class="meow" alt="" src="https://cdn.
Overwriting the src does not appear to be possible (presumably because the src attribute appears before the alt in the string), but we can mess with the class. After reading through Internet Roadtrip’s stylesheet for a bit, I found a rule that looked good enough for a proof of concept: 
Then, just to confirm that it’d look right, I manually edited the HTML to place a custom emoji in the chatbox with that class: 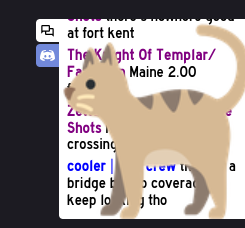 I deliberated for a while about whether I should actually perform this, and eventually decided to do so as I didn’t think it’d be very dangerous and also it would be really funny. Additionally, the website doesn’t handle Discord message edits (but it does handle deletions), which meant that I could superficially hide it on Discord from anyone without a message logger by editing the message.
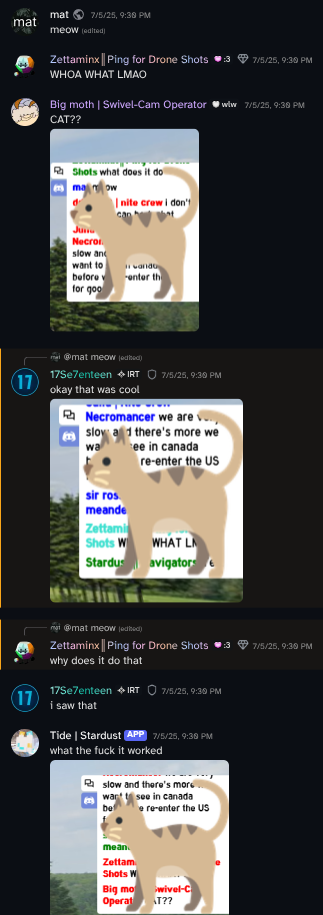
I shared details of how it worked with Mika, and she proceeded to do her own silly things with the exploit. She also added a Discord automod rule to make it harder to abuse by people who didn’t understand how it worked. 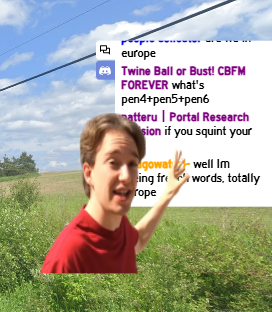
We spent a few hours trying different things, and noted down some more interesting details:
- The CSS from maplibre-
gl is available to us, which gives us a bunch more interesting styles. - Most of the styles used by the game require additional
data-*attributes, but DOMPurify doesn’t remove those by default. - We can place text by setting an invalid emoji ID (like
1) and putting alt text. - That text can be aligned and placed to a limited degree by using certain unicode whitespace characters.
Epilogue
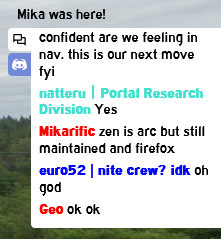
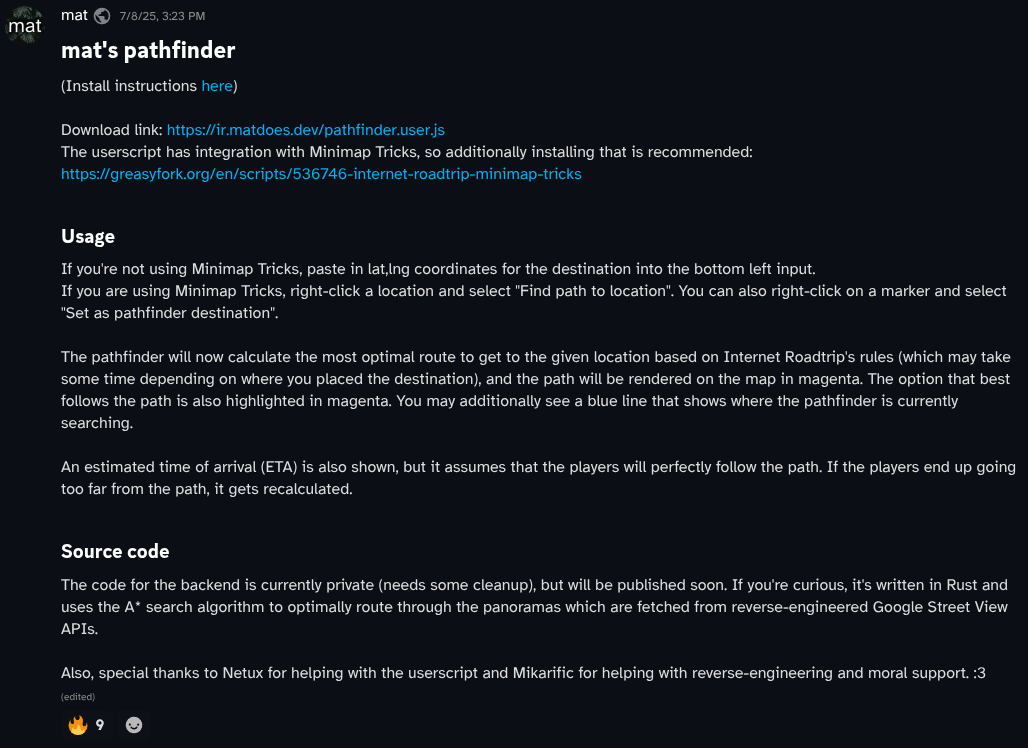
When I released the userscript, I was slightly worried that a few people would hate it due to being too powerful. Luckily, it was very well received by the players. Here’s the announcement message that I wrote for it:
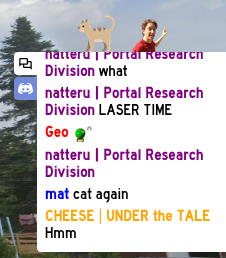
 And here were a few reactions by the players:
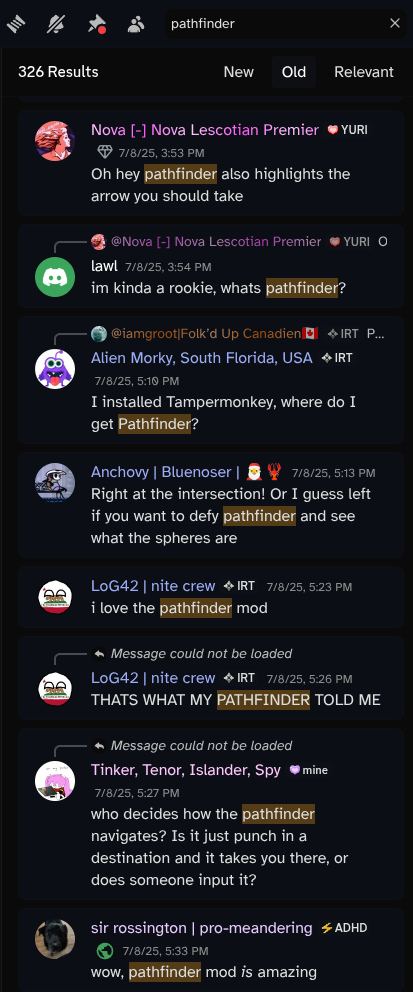


I’ve kept continuously updating the pathfinder, including implementing more optimizations and some requested features like adding stops to the path. Also, I’ve published the complete source code to the pathfinder under a public-
Special thanks to the other modders and people who helped with research, including Mikarific, Netux, Jakub, crschmidt, and Kali. And of course, thanks Neal for making Internet Roadtrip. <3
After I finished writing this blog post I sent it to Neal, and here was his reaction: 